
Our HEX History
LINK: https://bit.ly/2RideTheWorld
Today, I fancied sharing some advice and a little history that goes way back. Don’t cringe at the photos :-) We’ve also snagged you a FREE SHIPPING offer from HEX.
OK, Lisa and I get asked on a weekly basis for advice on “what accessories are essential or important enough to travel with?” So, here goes…
Today, the range and variety of bolt on accessories and motorcycle modifications is overwhelming, or at least it can be. And, unless you’ve got bottomless pockets it can be hard to realistically priorities where your hard earned cash is best spent.
After 500,00 ridden miles, today, my advise be to any rider thinking about spending some cash on their two-wheeled pride and joy, would be to prioritize equipment that allows you to travel farther, for longer and safer. And, the HEX GS-911 should be at the top of your wish list. It may not be as sexy as new rims, but all the bling and farkling in the world, means little if your bike isn’t rolling.
When I was prepping for our trip (way, way back) a good friend diagnosed an affliction that I didn’t realize I was suffering. The symptoms were easily spotted and centred around my ability to convince myself that ‘any’ modification I wanted, could be justified because of the “what if” scenario.
“You’ve got a bad case of “Spendi-tricky-modification-itious”, John told me bluntly. You’ve got to get some treatment or it’ll shave month or even years off your trip. The late John “Bunny” Hill was a great guy who put friendship and trust first.
On the subject of friendship and trust, we’ve known Stephan Thiel (Inventor, Owner and Chairman - Founder of HEX) since 2004 and met when we first rode into South Africa. Weeks later and we knew we’d made a friend for life and met someone that was way smarter than we were. So, when he asked us to test a prototype device that would allow us to communicate with our bikes and effectively ask them “what’s wrong” we jumped at the chance. Fast forward 16-years and the GS-911 device has come along way and looks a little different from the prototype we rode into Namibia with back on the early naughties!
Check out the images to see how different we (inc the GS-911) all looked.
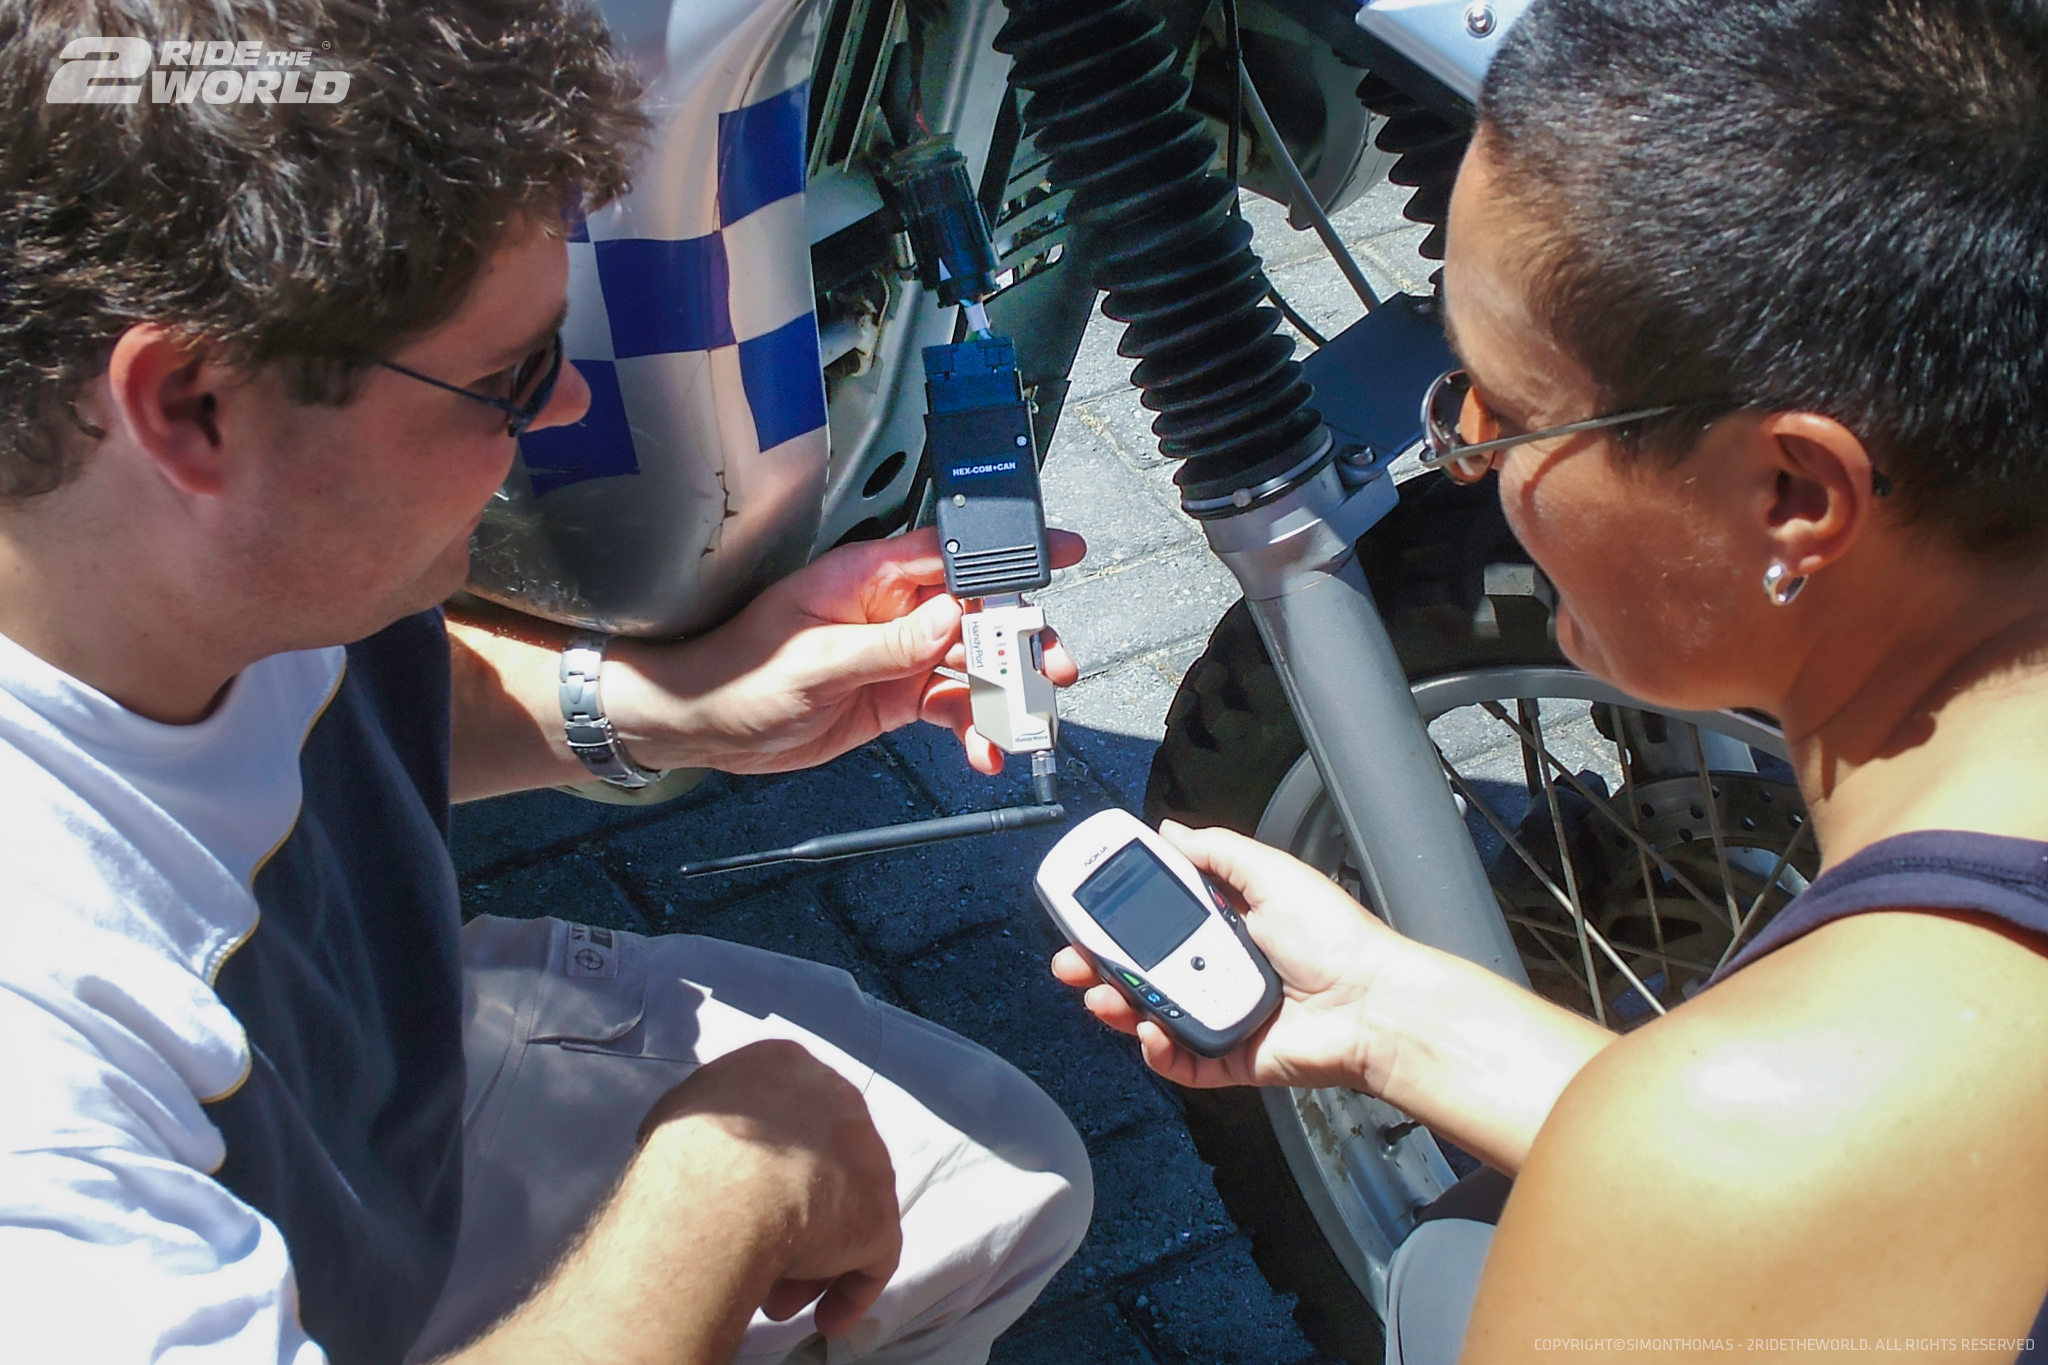
*Steph shows Lisa the GS-911 proto-type for the very first time prior to our ride into Namibia
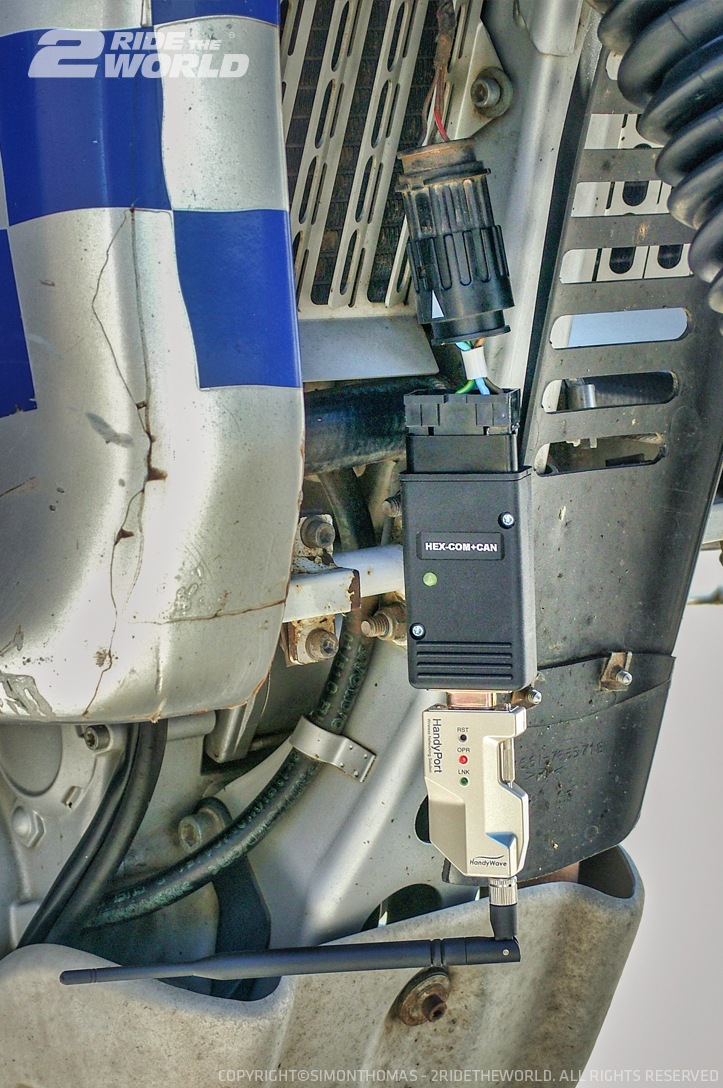
*The proto-type GS-911 diagnostic tool looked very different to the hi-tech wifi version of today
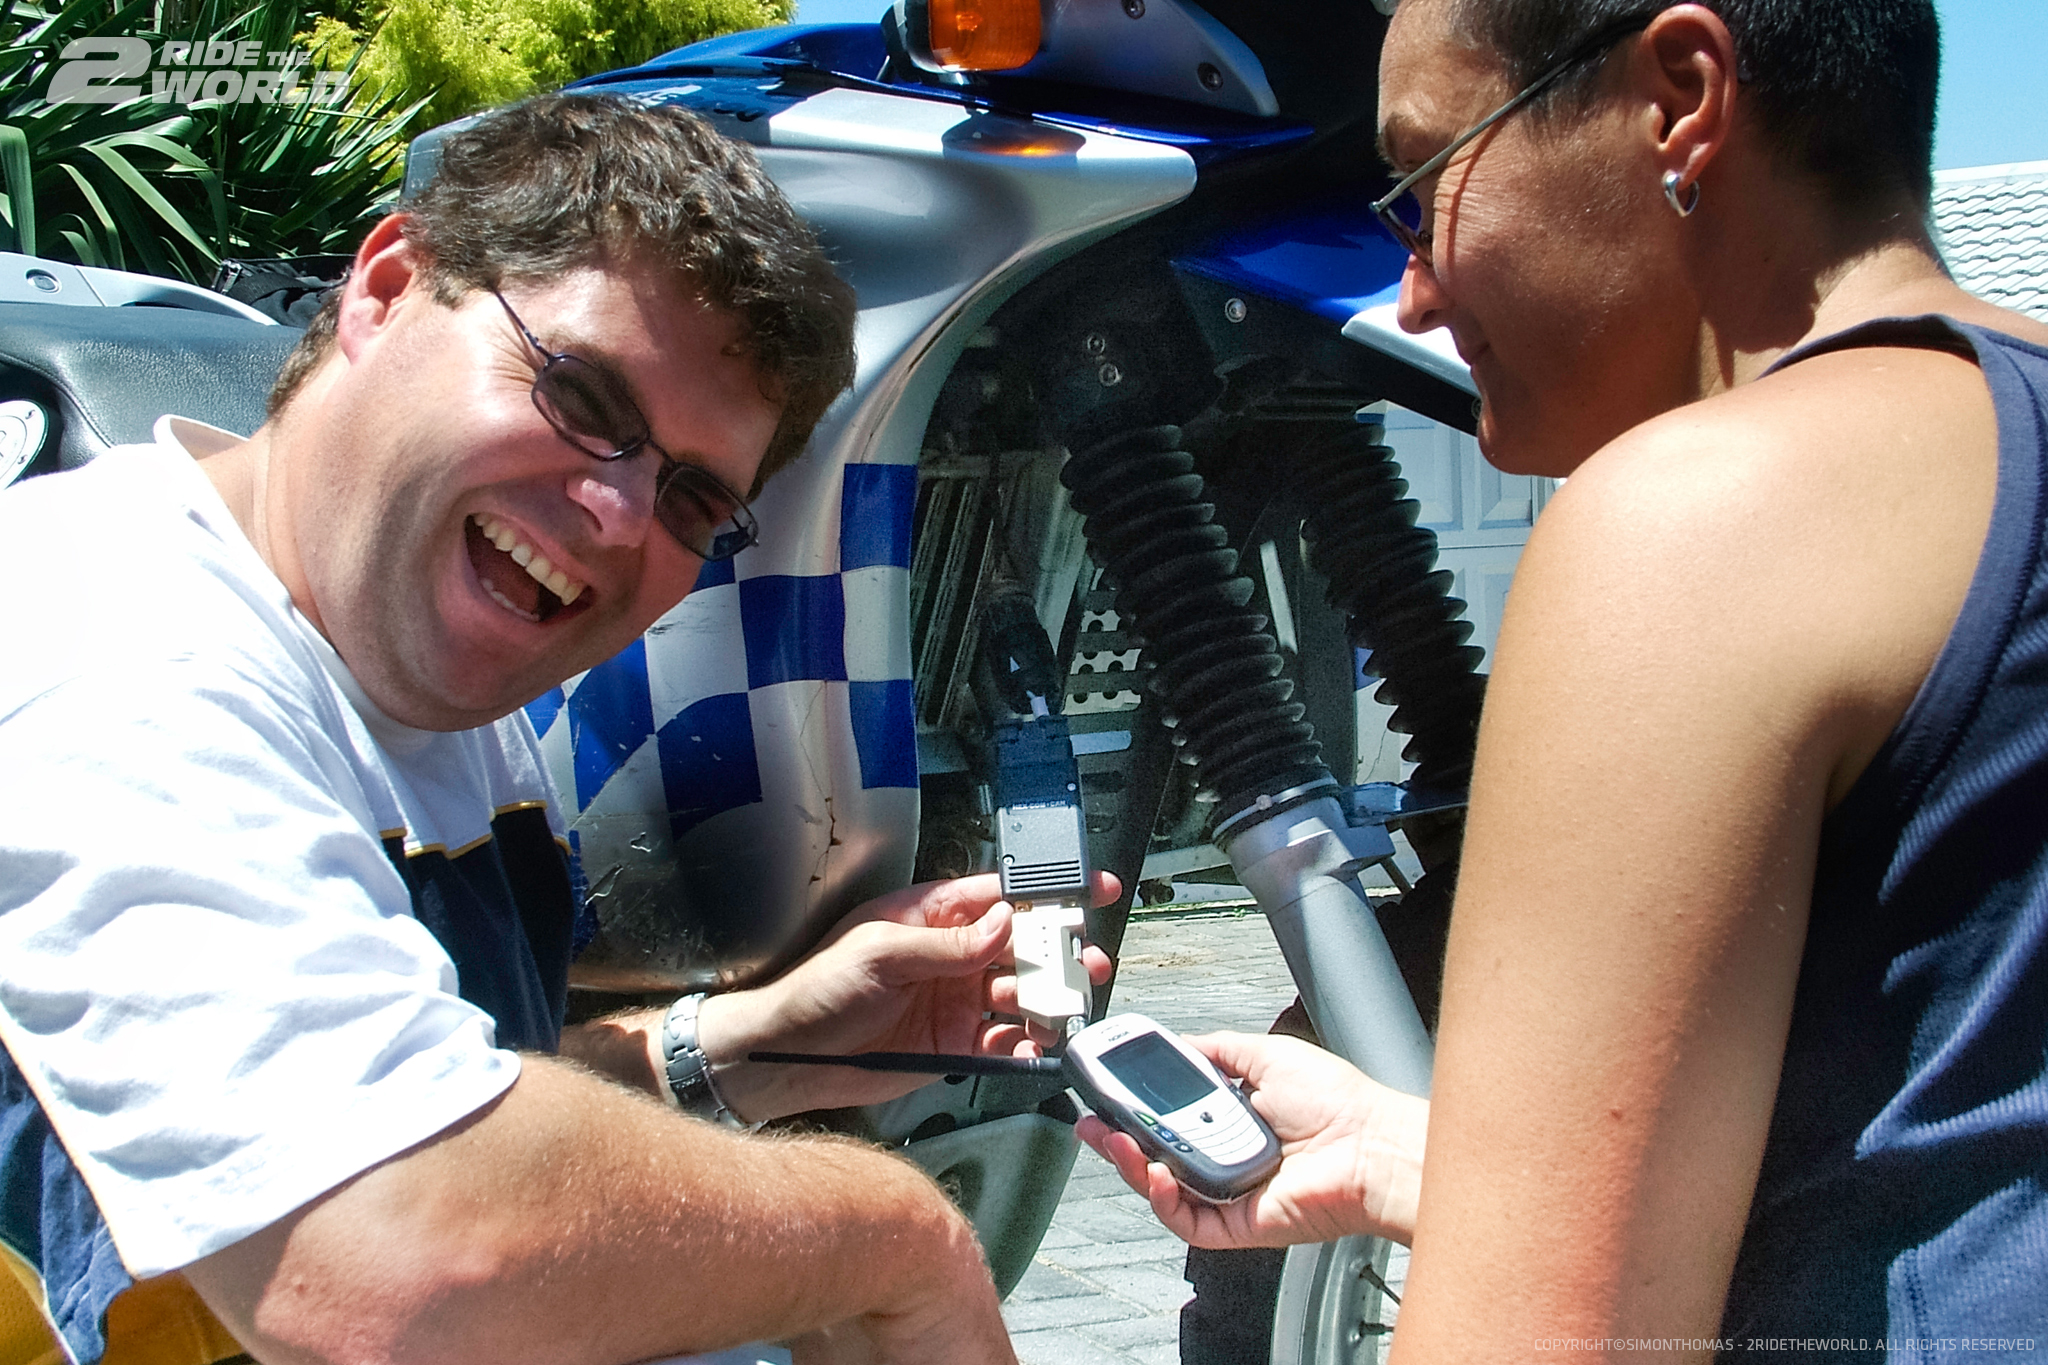
*Steph one of those rare individuals that is a funny as he is brilliant
With the amount of computer controlled functionality on today's modern bikes, it’s essential that you can communicate easily with your bike in order to have some control when fault finding, and in turn decision making, when things are working as they should.
If you still a little extra encouragement, well Lisa and I have been carrying a GS-911 for every mile of our trip since 2004. And, yes, it’s saved our are and a tone of money on many, many occasions. Am I biased? Absolutely!
Here’s a few of the features of the Hex GS-911
Features
- Professional level diagnosis
- WiFi or USB connection
- Can be used with PC or Mobile Devices
- Free software updates for at least 12 months**
Special Functions Offered
- Read and clear fault codes
- Reset service reminders
- Control unit information
- View live sensor values
- Log and graph live values
- Component output tests
- Component calibration
- Adaptation reset and relearn
- Basic coding
- Bleed Tests
- And much more….
Check out the GS-911 for yourself here: https://bit.ly/2RideTheWorld
If you want to check out which version is best suited to your BMW or KTM then use this clever VIN decoder, and you will be able to see which products will work with your specific bike.
Click the link to use the Vin Decoder UTM.
If you want to save yourself some hard earned money and pick up a FREE SHIPPING special offer, then remember to use the Coupon Code: 2RIDETHEWORLD6HwX. Just type (or copy and paste from here) at the checkout.
You’ll get FREE SHIPPING on your order. This offer includes orders shipped to Europe/USA/Canada and the UK.
Have fun